How to Prepare Your Home for a New Cat: A Step-by-Step Guide for First-Time Owners
By the end of this guide, your home will be ready for your cat’s arrival — safely cat-proofed, with a working safe room and all essential supplies in permanent positions. Work through each step in order: complete one phase before moving to the next. The sequence matters as much as the steps themselves, and it makes a real difference on the day your cat arrives.
What This Guide Covers
- How to cat-proof your home room by room — cables, hazards, toxic plants, and chemicals — before your cat arrives.
- How to set up a safe room with each item in the right position, and how to establish permanent supply placement throughout the rest of your home.
- The arrival day sequence that gives your cat the smoothest possible first experience in their new environment.
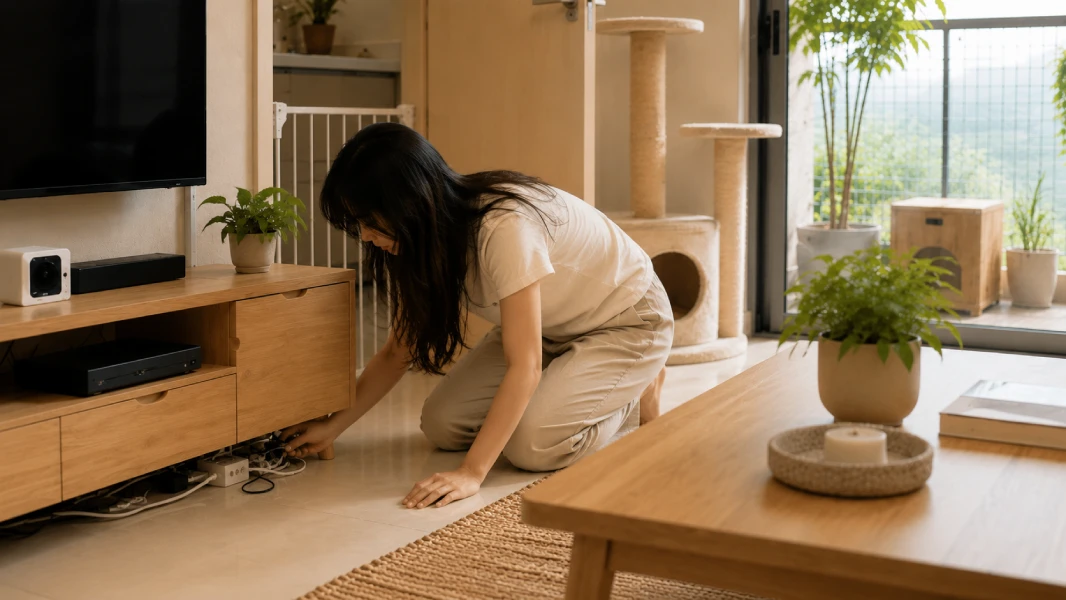
Step 1: Cat-Proof Your Home Before Your Cat Arrives
Cat-proofing comes first for one straightforward reason: cats explore every space they can reach, and they do it faster than most new owners expect. Complete this phase before setting up a single supply, before arranging the safe room.
Identifying and Removing Hazards Room by Room
Walk through every room your cat will have access to and check from floor level — from your cat’s perspective, not a standing adult’s. Start with the area your cat will first access, then move through each room one at a time.
Living room:
- Cables from TVs, chargers, and speakers lying on the floor
- Narrow gaps behind sofas or entertainment units
- Small objects on low surfaces: coins, paper clips, rubber bands
Kitchen:
- Unlocked lower cabinets (especially those storing cleaning products)
- Gaps behind or under the refrigerator and stove
- Plastic bags and shopping bags that could trap or suffocate
Bathroom:
- Accessible medicine cabinets
- An open toilet (a real risk for kittens)
- Personal care products on reachable surfaces
Bedroom:
- Hair ties, needles, and small accessories
- Gaps behind large furniture
- Plastic bags or packaging materials
Balcony and outdoor areas:
- Rail or fence gaps wide enough for a cat to squeeze through
- Plant pots that could fall
- Access to areas that can’t be monitored
Securing Cables, Cords, and Small Objects
Exposed cables are among the most common hazards new owners overlook — and one of the easiest to address before arrival day.
- Cable covers or spiral wrap: protect cables that can’t be moved or hidden
- Cable management box: conceal a cluster of cables behind one enclosed unit
- Cable clips: fix cables to walls or skirting boards so they’re off the floor
- Small objects: store in closed drawers — hair ties, rubber bands, needles, and small accessories are the first priority
The practical standard: if it’s small enough to swallow, it needs to be somewhere your cat can’t reach.

Handling Toxic Plants and Household Chemicals
Several common houseplants are harmful to cats if chewed or ingested — including lilies, pothos, philodendron, and dieffenbachia. If you’re unsure whether a plant is safe, move it to a room your cat won’t access, or check with your vet before your cat arrives.
Cat-safe alternatives that work well as substitutes: spider plant, Boston fern, areca palm, and lucky bamboo.
For household chemicals:
- Move all cleaning products, detergents, and chemicals to upper cabinets — not lower ones
- Add child-proof locks to lower cabinets if you store any products in accessible areas
- Store all medications in a locked cabinet or in a room your cat won’t enter
Once you’ve worked through each room and removed or secured every hazard you found, Step 1 is complete. Your home is now safe for a cat to explore.
Step 2: Set Up Your Cat’s Safe Room
Now that your home is safe, the next step is building your cat’s first base — one room that will be their entire world for the first few days.
The goal isn’t to limit your cat’s freedom. It’s to reduce the number of new things they have to process at once. A smaller, controlled space gives most cats an easier place to orient before they gradually explore the rest of the home.
Choosing the Right Room
A good safe room meets three criteria: it’s quiet, its access is fully controllable, and it’s small enough to feel secure without feeling confining.
What to look for when choosing:
- Low foot traffic — not a hallway or a room the household passes through constantly
- A door that closes fully — complete access control is essential
- A manageable size — a spare bedroom or larger bathroom works better than an open living room
- No hidden gaps — a new cat will find every space behind furniture that you can’t easily reach
A bathroom, spare bedroom, or utility room that’s large enough for the basics often works well. The most important factor: it’s a room you can close off completely, without too many inaccessible hiding spots.
What Goes in the Safe Room and Where to Place It
This is a placement guide, not a supply list — the focus here is where each item goes, not what to buy.
- Litter box: far corner of the room, away from the door and the feeding area
- Food bowl: on the opposite side of the room from the litter box
- Water source: separate from the food bowl — at least 30 to 40 cm away
- Bed or blanket: low and sheltered — under a desk, low shelf, or against a wall
- One hiding spot: enclosed and at floor level — an open carrier, a cardboard box with a hole cut in, or a cat cave
- One or two simple toys: near the sleeping area, not in the middle of the room
- Pheromone diffuser: plugged in near cat level at the center of the room — set up 24 to 48 hours before your cat arrives

When everything on this list is in place and the room feels calm and contained, your safe room is ready.
Step 3: Place the Essential Supplies Throughout Your Home
With your safe room ready, the next step is establishing permanent positions for all supplies outside the safe room — before your cat begins to explore.
The most important principle in Step 3: consistency of location matters more than a perfect location. Cats build spatial memory through repetition — they learn where food, water, and the litter box are by returning to the same spots reliably. Moving supplies after your cat has started to orient will slow down adaptation, not improve it. Choose positions that work for your routine, place everything there, and keep it there. Avoid moving feeding stations, litter boxes, or beds during the first few days unless there is a clear reason to do so.
Placement decisions to make now:
- Main feeding station: a quiet spot away from high-traffic areas, easy to clean around
- Second litter box (if using two): in a different room from the safe room litter box — the standard rule is one box per cat plus one
- Cat tree or tower: near a window where possible — cats are drawn to the combination of height and outdoor visual stimulation
- Scratching post: near your cat’s sleeping area or a frequently used space — not tucked into a corner where it won’t be found
- Additional water source: positioned well away from both the litter box and the main feeding station
Once every item has a permanent spot your cat can learn and reliably return to, Step 3 is complete.
Step 4: Prepare for Arrival Day
With your home cat-proofed, your safe room set up, and all supplies in position, one thing remains: preparing the day itself so nothing needs to be handled in the moment.
Follow this sequence on arrival day:
- Close off all rooms except the safe room before your cat enters the house
- Carry the carrier directly to the safe room — don’t stop in other rooms along the way
- Set the carrier on the floor, open the door, and step back — let your cat exit on their own timeline
- Leave the room once your cat begins to explore — don’t hover
- Keep noise low and limit visitor traffic for the first 24 hours
- Check food, water, and the litter box after 2 to 3 hours — without entering if your cat is still settling

At this point, avoid changing the room setup unless there’s a clear problem. Changes on day one disrupt the spatial orientation your cat is actively building.
If you’ve followed this sequence on arrival day, your cat is set up for the smoothest possible first night.
Is Your Home Ready for a New Cat?
Use this section to verify that every phase is complete — and for guidance specific to more complex living situations.
Home Preparation Checklist: A Quick Final Check
If you can check off everything below, your home is ready.
- Cat-proofed all rooms your cat will have access to
- Removed or secured all identified hazards
- Safe room fully set up with all essentials in place
- All supplies outside the safe room in permanent positions
- Arrival day sequence planned and ready
- Pheromone diffuser installed and running
What to Do If You Live in an Apartment
Apartment living doesn’t require a fundamentally different approach — just a few specific adaptations.
- Use the bathroom as a safe room if you don’t have a spare bedroom — it’s controllable, easy to clean, and usually has few hidden gaps
- Install balcony safety netting before your cat ever has balcony access — this isn’t something to defer until later
- Use vertical space as a floor space substitute: a cat tree, wall-mounted shelves, and a window perch all expand the usable space for your cat without requiring more square footage
One principle to hold onto: don’t try to compensate for limited floor space by giving your cat immediate access to the whole apartment. A small, controlled space first always works better than a large space that overwhelms a cat still learning where everything is.
For a full guide to setting up an apartment for a cat, setting up a cat-friendly living space covers vertical space planning, furniture layout, and balcony safety in detail.
What If You Have Other Pets or Young Children?
If you have other pets: The safe room serves double duty — it gives your new cat space to adjust while keeping them separated from existing animals during the introduction period. A baby gate or closed door ensures other pets can’t enter the safe room. Setting up separate feeding stations from the start prevents resource competition that can make introductions harder.
If you have young children: The physical setup is the same — the safe room remains a private zone for your cat, not accessed without supervision. Beyond the physical setup, the most useful product decisions involve tools that support safe interaction: toys that both child and cat can engage with at a safe distance, and hiding spots positioned high enough that your cat can disengage from a situation on their own terms.